

handmade gifts rock
Hey there friends! We haven’t done something crafty here for a little while, but today we will. It’s a handmade chipboard photo book, as part of a Canadian handmade gifts blog hop. That means you can search this hashtag on all your social media #CDNHandmadeHoliday and find lots of ideas for handmade gifts for less than $25. Fun, right? It's no secret around here that I love a handmade gift. Check out the Handmade tab in the top menu bar to see what I mean.
But let’s get started.
But let’s get started.
1. How to Start
First thing to do is find yourself a chipboard album. They come in all shapes and sizes, search your local craft retailers or online. I found this one on amazon.ca for for about $10 …it’s no longer available but there are lots of others. Keep checking back since new versions come into stock all the time. I also have a few from Michaels with jump-rings instead of spiral binding. But I’ll show you how to work with whatever style you get.

supplies
Take your book apart so that the pages and binding are separated, and decide how many pages you’re going to make. Don’t be restricted by the way the book is packaged. If you want more pages buy a second book and add the pages in, or take some out if there’s too many. This book came with intermittent half size pages which I ended up not using, so I just left them out. Another project for another day.

yes, I’m working on the floor…
2. Print Some Photos
Choose the photos you want to use in the book. I printed them at home as the best way to end up with photos that fit the page. I used this 8 1/2” X 11” photo paper in a matte finish, the large size paper makes it easy to print odd sized photos such as 6” X 6” for this book, or 8” X 8” for another set of books I have to do. The package is about $15 and I only used about a quarter of it for this project.
I used Adobe Lightroom to manage the printing. In the Lightroom Develop module, I cropped the photos to the dimensions of the chipboard. In this case it’s a square, but you can choose whatever dimensions you need.

in the “develop” module
Then in the Lightroom Print module, drag the margins of the print area to the size of your chipboard page. For this book the size is 6” X 6”.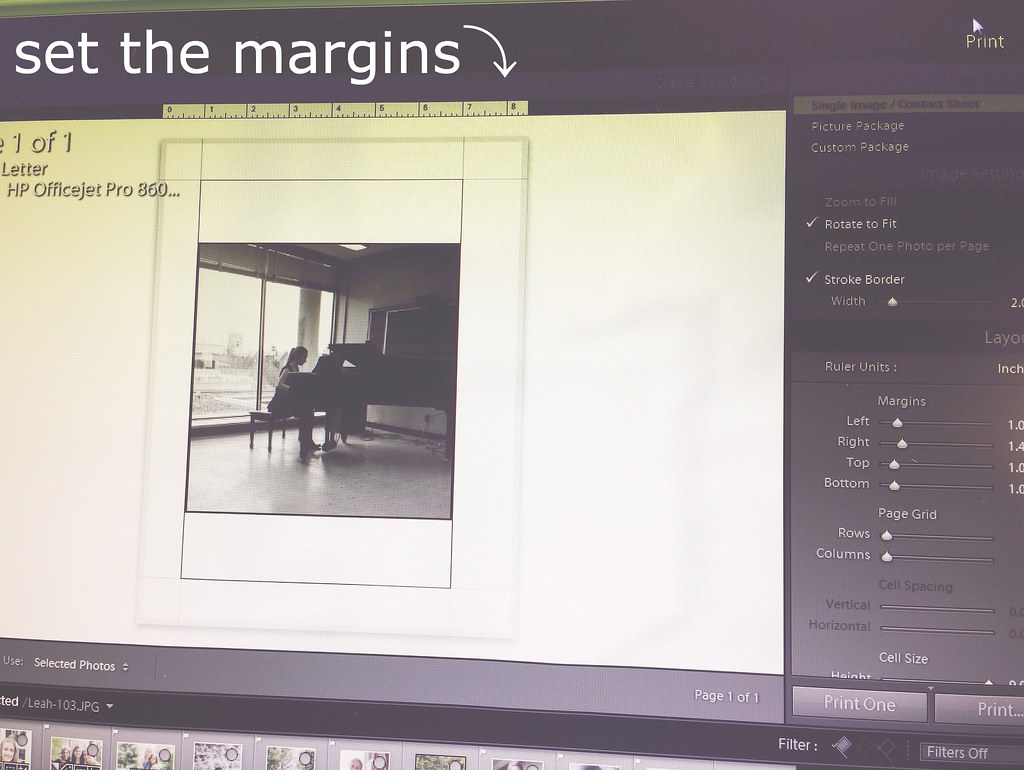
in the “print” module
(Psst…for more tips on using Lightroom for photo editing check out this post on How to Take This Photo.)
When you have all your photos cropped, sized and printed out then the fun crafty part begins…

yup, still working on the floor…
3. The Crafty Part
Now you need to trim your printouts to the size and shape of your page. I used a paper-cutter to cut out the basic shape, keeping one of the chipboard pages handy to double triple check that it fit. Then, because the corners of my pages were rounded I used a pencil to trace around the corners and just trimmed that part with scissors. You could also use an exacto knife. Some books come with pretty decorative edges to the pages, like scallops, but again just trace the edge onto the back of the photo and trim away the excess.


it’s all about the details
You’ll notice I have a number pencilled onto the back of the chipboard. You’ll want to match up one photo to each side of a chipboard page to make sure you end up with the right sequence of photos, and that you’ve trimmed the correct edges of each photo to match the page. Trust me on this one. Don’t skip this step!
Now the photos can be glued to the pages. I used this Elmer’s rubber cement. It is a little bit noxious, but it’s the perfect consistency without damaging your photo, comes with a good sized brush for applying it, and costs only about $3.

open a window…or don’t breathe…
Glue one photo to one side of a page, matching up your numbers. With one photo glued down, punch holes through the photo using the holes in the chipboard page as a guide. Then glue down the photo on the reverse side, matching up the numbers, and punch through the holes again, using the first set of holes as a guide.

* punch the holes through one photo at a time *
Now you can re-attach the spiral binding, or the jump rings, and put the whole book together. I love the seamless look of the photos filling the whole page right through the binding, and the continuity of the layout when the book is opened flat.


the end…
(last page photo cred)
As a final touch I wove a length of sheer ribbon through the spiral binding and used it to tie the book together. I liked how it added another layer of texture, and another element of being handmade and personal.
4. More Handmade Gift Goodness
Don’t forget to hop over to any social media… instagram, facebook, or twitter… and follow the hashtag #CDNHandmadeHoliday to find lots more inspiration for handmade Christmas gifts. And if you liked this idea please share using the pretty coloured buttons to the left. I would love love love it if you did that!
Also don’t forget to sign up to get posts delivered right to your inbox, and never miss a bit of learning and inspiration. There’s more handmade and Christmas awesomeness coming soon.
xo andrea
linking to thoughts from alice, merry about town, homeremediesrx, diy dreamer, clean and scentsible
Sharing is lovely...

