don’t eat the cookies yet
Hey bloggy friends! This is my second edition of How to Take This Photo. I don’t discriminate against cameras…I hope you don’t either. I took this one with my smartphone. I take a lot of my blog photos with it. And photos to send to family and friends. Photos for instagram. Photos of cookies.
Subject:
I chose something a little trickier for my subject so we could learn a few things. So here’s a set-up for baking plus some of the finished cookies. A typical shot for posting a recipe. Or for remembering that time you spread out chocolate chips on your countertop. Whatever. It’s inside, in a bit of a shadow-y corner, plus it was a pretty dull and dreary day outside. If you use your phone camera very much you know that poor lighting can be a challenge and give grainy and blurry results…
…but it doesn’t have to…
Set-Up:

* still don’t eat the cookies *
I set up a vignette of ingredients, baking utensils and finished cookies (yay! there were a few left!) on this corner of my kitchen countertop. It’s one of my favourite places to photograph foodie type pictures. The window light comes in beautifully from the side, creating soft shadows and a sense of dimension. Plus I love my countertops and backsplash as a backdrop. Do you know where the light is good at different times in your house? If not I suggest you take on the project of finding it out. This is important information for good photography. You can thank me later for suggesting it.
Shoot:
1. In any situation where the light is a little low, I use the Cortex Camera app. It’s the best one for capturing a crisp, high resolution photo in low light, and in my opinion well worth the $2.99 price tag.
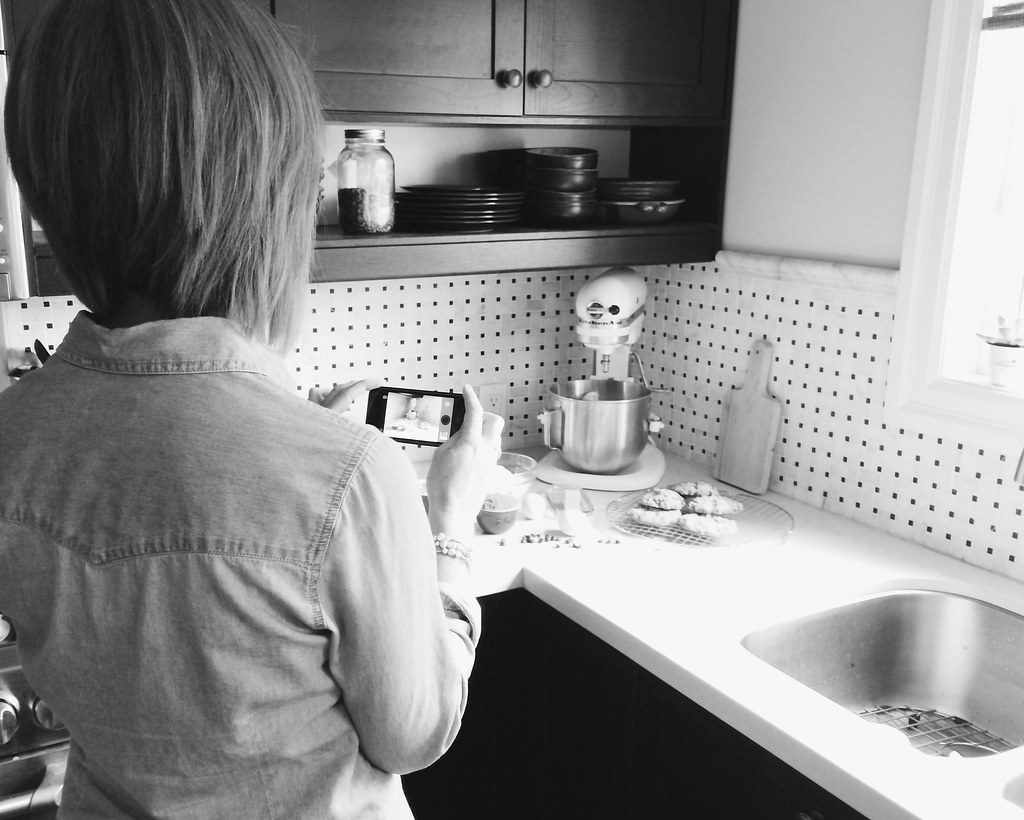
2. Hold the phone steady. We’ve all taken photos with the phone held way out in mid-air and our elbows stuck out sideways. But really, you want to steady yourself and the phone as much as possible. Here I have my feet shoulder width apart and my elbows propped against my waist. This is always a useful stance that copies the idea of a tripod to keep your phone, or a camera, as steady as possible.
3. The Cortex Cam takes a second to capture the shot, so keep it steady until it’s finished the exposure.
Edit:
There are SO many photo editing options and apps for your smartphone…pleeeeeeease don’t publish your photos without editing them. Seriously. Please. Wait till you’re sitting in the car waiting for someone, or at Starbucks. Or while you’re watching Netflix. Look through your photos, edit and re-save them and then post.
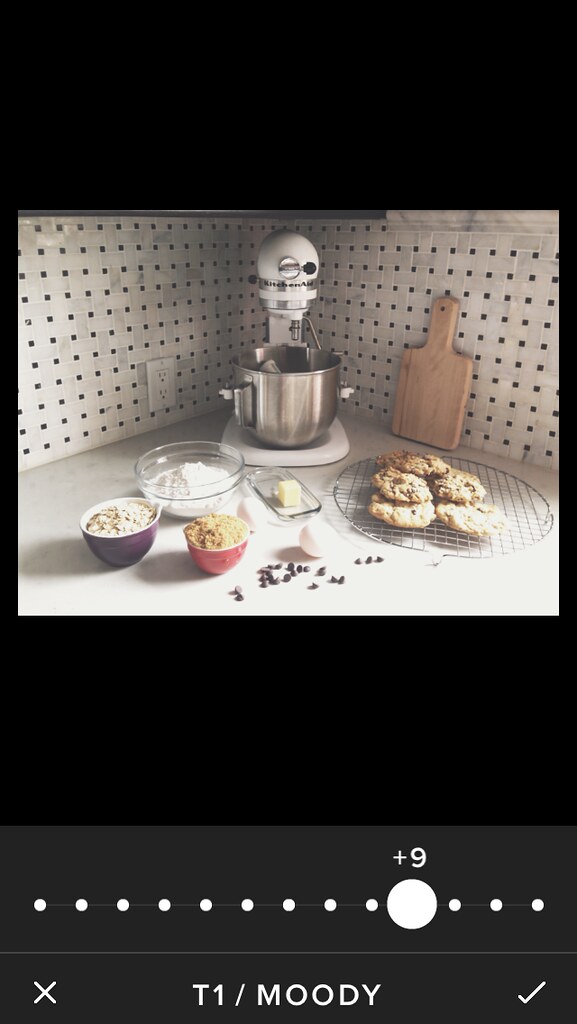
1. If you’re adding a filter this should be the first step. Different filters will make your image darker or lighter or grainier… you never really know till you add it, so do it first then tweak the other things afterwards. Right now my favourite filters are in the VSCO Cam app. So I import my photo into the Library and add the filter. If you double tap the filter you have the option of changing the intensity, so sometimes I tone it down to about +10 or +9. Then Save To Camera Roll.

I’m a moody person * I like the moody filter
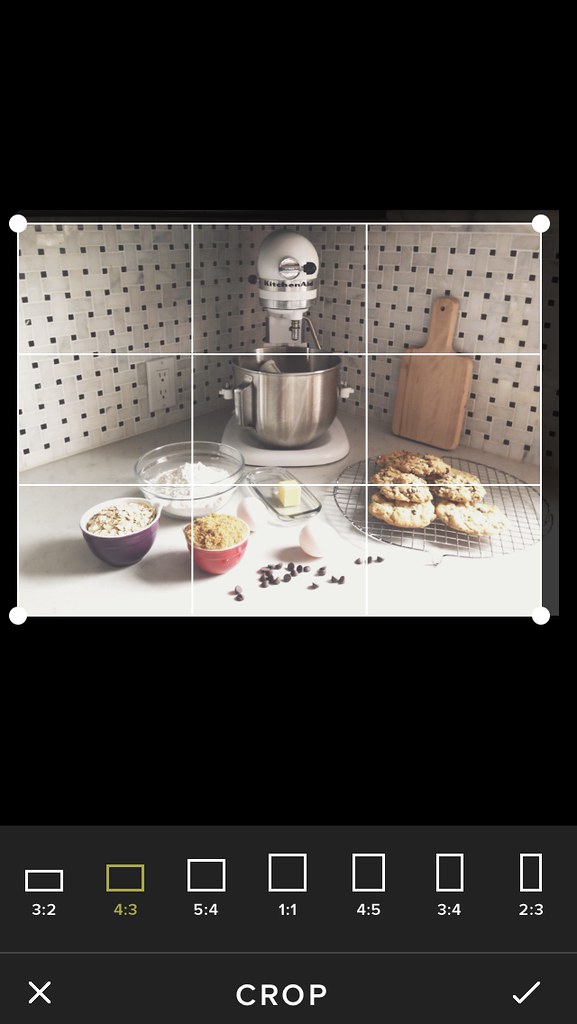
2. After adding a filter there are three must-do edits. These days I’m doing all of them in Snapseed. Usually I do the crop first. In this photo there’s the bottom edge of the cabinets in the top of the frame which I wanted to crop out. If you want to end up with a square image you can do that too.

composition is key
At this point we could talk endlessly about composition, and you can feel free to debate my methods, but we’ll save that for another day. Can you hardly wait???
The second must-do edit is brightening, found under Tune Image tab. Always check to see if your photo looks better a little bit brighter. And the third is sharpening in the Details tab. Play around with these two sliders until you’re happy with the result.
Export:
From any of these apps you have the option to export to all kinds of other libraries and apps. I always save to my Camera Roll. Just because. I’ve had too many disasters happen in life to not save everything at every opportunity. You can export to Instagram to open it right in the app for posting.
And if I’m using the image on my blog I export it to Flickr. What I love about using Flickr is that through Blogger I can access my photos from Flickr on my laptop, or through Blogsy on my iPad. So I have all the photos I need accessible from anywhere I might need to use them.

the world is your oyster
Publish:
NOW you can publish your photo and be happy. Tag me in your posts so I can follow you and see what you’ve published. I’d love to see! And let me know which apps and options you use too.
Hope you learned something helpful. I’m looking forward to my instagram feed being more beautiful from now on.
And now we can eat the cookies.

Sharing is lovely...

