Well we haven’t done anything foodie on here for awhile, so let’s change that today! This is another one of my go-to recipes, great for a week night or weekend, and really easy. We eat a lot of Mexican, and everyone really loves these easy quesadillas.

* pin me *
You’ve probably made quesadillas of some sort before too. There are so many variations around, it’s easy to keep the ingredients on hand, and sometimes a good way to use up leftovers like some roasted chicken. This version has only four ingredients and is super easy. Four. You don’t need a recipe. Even the kids can make it themselves start to finish.

* kids in the kitchen *
I’ve blogged about cooking without a recipe before
here. I really think it’s a time saver and a way to make your life easier. Sometimes you need a few things you can easily shop for on the way home when you don’t have a plan. Or be able to make without opening pinterest or a cookbook and constantly refer to … while you’re also helping with homework, or unloading the dishwasher, or letting the dog in and out the back door.

* always in the way during meal prep *
Of course I think it’s important to be creative and adventurous… but sometimes you just gotta eat, right?
Also once you get them going you might as well make lots. If you’re actually feeding a crowd, or your crowd is just your family of hungry boys then this recipe is for you. And if you’re only going to have some of them, they freeze really well and just need to be heated through again on the griddle or non-stick pan, or even in the oven. So here we go…are you still with me? Don’t be distracted by the dog…

* make lots *
Four Ingredients:
1. Eight inch (the small ones) flour tortillas. I use the white ones for this recipe, but your choice. To make the complete for a crowd recipe, use two packages of them.
2. Refried beans. They come in a few different varieties. We like the ones that have green chilies in them for a little extra heat, but I sometimes use the plain variety too. All good.
3. Salsa. Any kind. Any kind at all.
4. Shredded tex-mex cheese. I actually consider this a staple and my fridge is never without it.

* all the ingredients *
How to Make Them:
1. Empty the can of refried beans into a medium bowl. Add just enough salsa to make a more spreadable consistency…about 3-4 big tablespoons.
2. Then get your griddle heating, or your frying pans. Whatever you use for making pancakes, grilled cheese, etc. A medium-low heat, just enough to toast the quesadillas and melt the cheese.
3. Then clear up a big prep space for assembling the quesadillas. Lay out as many tortillas as you have space for. Spread one half of each one with the beans/salsa mixture, then sprinkle (or load up!) the same half with shredded cheese.
Optional: If you are feeling fancy you can snip a little green onion over the cheese for an added layer of flavour. Totally optional, but around here green onions rarely get used up with one recipe so there’s usually one or two hanging around in the fridge anyway.

* optional green onion garnish *
4. Fold them over and warm them in the pan on each side till the tortilla is lightly toasted and the cheese is melted. Repeat until all the tortillas and bean/salsa mixture have been used.

* yum, they’re almost ready *
4. Remove them from the pan to a cutting board and cut each one in half. Then I usually just pile them all up on the cutting board and bring them to the table. Maybe with a container of sour cream and some more salsa for dipping. A few raw veggies with some ranch dressing and I call that a weekday meal, or anytime food for a crowd.

* easy quesadillas for a crowd *
Note: If you only use one package of tortillas, or don’t use all of the bean/salsa mixture, I often will use the remaining bean mixture to make a layer dip…beans, guacamole, sour cream, salsa, shredded cheese. Serve it alongside the quesadillas with corn chips for dipping, or cover it with plastic wrap and it keeps well in the fridge for a day or two. Here’s a great way to make it for a party.
These are on the table in less than half an hour. Perfect for those busy weeknights, or weekends when you need something quick and satisfying. Enjoy!
More quick and easy dinner recipes:
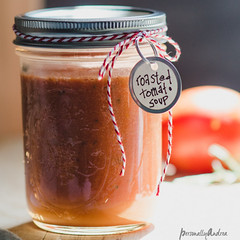
 Roasted Tomato Soup
 //
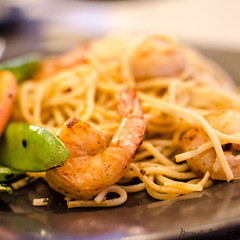
Garlic Shrimp //
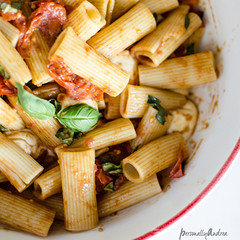
Easy Caprese Pasta
xo andrea
linking to


Sharing is lovely...

